FIXING A BROKEN DRIVE TANG

The Jones Counter, model JR, fits the majority of bikes with no modification. However, some bikes have front wheel geometry that makes installation difficult. In some cases, the drive tang (the little bent-over piece that is pushed by a spoke) gets bent or breaks off. This is usually caused by inattention during installation. When the counter is put on the bike, and the axle nut tightened, there must be some play, or shake, in the mechanism. If there is any binding at all, the unit must not be used until the binding is eliminated. If this is not done, the tang may be bent or broken.

We supply replacement chassis to fix bent ones, but there may be a better way.

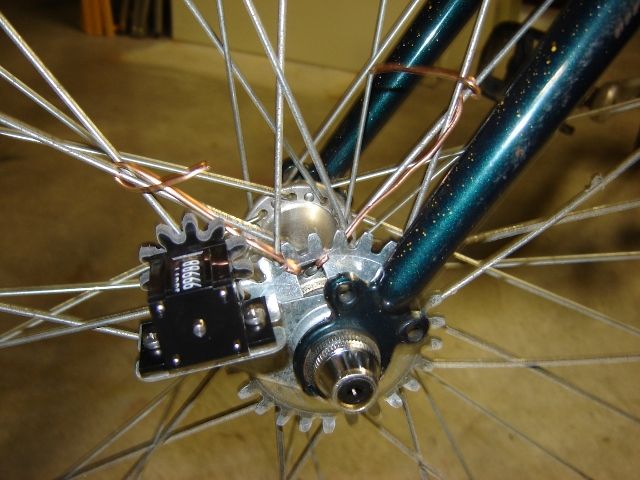
I have done some experimenting and have come up with a simple fix. It is shown in the photo below.
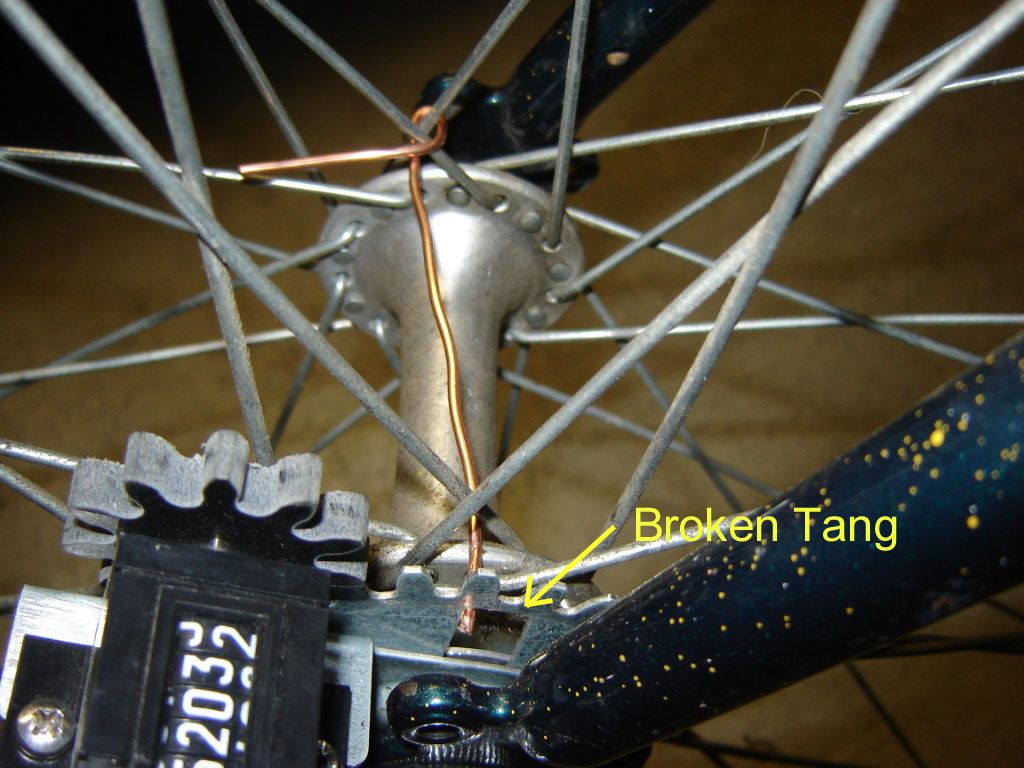


A wire is bent into a u-shape and inserted through the wheel as shown, until the end projects beyond the hole where the tang was, on the left-hand side of the bike. The right-hand side end of the wire is then wrapped around the crossed spokes, preventing it from moving. This leaves a bit of wire projecting beyond the left-hand side of the chassis. If not trimmed, it will prevent the wheel from turning. With a suitable cutter the end of the wire must be cut off so that it projects through the tang hole, but does not interfere with proper rotation of the wheel. Before trimming, be sure there is free play between the gear and the wire.

This fix has one strong advantage. It provides a direct drive to the large gear, which is in line with its direction of movement. It is strong enough to drive the unit, but weak enough to just bend out of the way if something causes the gear to bind, preventing damage to the chassis.

Counters have, until now, been provided with a pair of electrical connectors which extend the reach of the tang, but these sometimes fall off. In addition, the pushing force on the unit is offset from the plane of the gear, and may cause extra friction.

No Jones counter has ever fit all bicycles, and ours is no exception.

This is a preliminary posting, and commentary is invited.

PS: The wire I used is 14 gauge copper (0.064 inch diameter). It's working pretty well. There may be better wires, but I think I hit it pretty close with this choice.
Last edited {1}
Original Post

Replies sorted oldest to newest

The wire is anchored on the right side, and guided on the left. This lets the left end of the wire project thru the tang hole, and keeps it from moving back and forth. As the wheel rotates, the wire pushes the gear around ahead of it.

Thus the push is in line with the plane of the gear. There is no need to have the wire anchored on the left side. As long as it projects through the tang hole it will push the gear.

Anyone can try what you suggest. In fact I have done so, and believe that what I have is better, as it provides discoupling when resistance is encountered, keeping things from getting bent.
I like your very easy to implement wire, Pete. I will now recommend it to those I issue new counters to. In fact it is something that might be worth adding to the JR counter instruction as an alternative to the push on extension to the tag.

I have had a few measurers experience bending after using the push on extension. It is a weakness in the JR design, and I usually have to fend off their claims that the design is too flimsy.

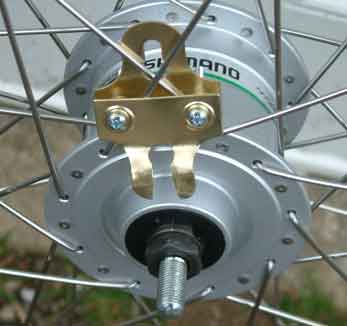
Up to now I have been recommending a brass "bodge" which I made for a wheel with a dynamo hub where the radius of the spoke attachment was too great to be satisfactorily reached with a push on extension. I am sure that your wire idea would have worked well, however I am very happy also with my solution:


I got two brass bracket pieces from the hardware shop; cut the slot with tin snips, and bolted around the spokes. The tag of the JR fits very neatly into the slot and so there is no bending.
During a recent measurement, I found that the tang bent when I backtracked during an overshoot. Riding forward there was no issue, but every time I went backwards, the drive gear seemed to bind and bend the tang. Fortunately I had brought along an older model JO counter and used that for the remainder of the ride.

Interestingly, another rider accompanied me on part of the ride and his tang broke completely before he'd even made it to the calibration course; he fixed it by drilling a small hole through the drive gear then wiring it to the spokes.

I guess I need a new chassis; how do I get one and how much?
Here is an improved way to fix a broken tang. It uses two pieces of wire.

Each piece is bent into a tight “U” that is just big enough to fit the edge of the tang hole. The piece is hooked into the tang hole, and the other end twisted around a pair of intersecting spokes. One wire pulls the gear in the forward direction, and the second in the reverse direction.

Be careful not to over-tighten – a very small amount of slack is desirable.

The direction of pull is such that the gear is pulled slightly in the upward direction. This results in less friction in the gear mechanism.

It has been working well for me so far.

This may be a good way to hook up the counter when the wheel hub has a large diameter.

Comments welcome.

Last edited by peteriegel
Yes the first thing I noticed when I opened the box just yesterday when I got my first counter was it was a bad design. The price I paid did not match the quality expected. The wire idea is a solution and I will use it, but the device needs a better design perhaps by a machine shop expert. I think they can tweak this real fast. If the tang were longer, adjustable and attachable is the three things the machine shop person should redesign.
Sammy, I can't let this go.

This basic design has been in use for almost 40 years. I have used some of these counters for hundreds of miles, even leaving some of them on for my training rides, which should not be done. I have never had a tang break when the counter was properly mounted. Over-tightening the hub nuts can bind the counter, so the wheel moves, but the counter disk moves slower, bending or breaking the tang.

Engineers did design the latest counter. Apparently you are not an engineer, nor did you stay at a Holiday Inn Express, or you would have noticed that the tang is cut from material in the disk. There is no more material to use for the tang, as it goes almost to the center of the disk. Second, it is "adjustable" by using the included wire connector. Third, the tang has a hole in it, so you can attach it to your spokes.

If you can come up with a better design, I invite you to do it. Until you have a better design, maybe stop to consider that, for what this is, and the price that is charged, this may be the best design for the application. Keep in mind that not all bike hubs and forks are designed the same, so whatever design you come up with must work on many different hub/fork configurations, and be affordable.

It is easy to criticize something. But, unless you have a solution, whatever you are criticizing may be the best solution available. If so, criticism is unwarranted. Critique is fine. Casting aspersions on the designers, who designed the latest counter on their own time, and put up their own capital for the manufacturing process, is not warranted, and is not in-keeping with the intent of this forum. And no, I had nothing to do with the project.
Tom, I appreciate what you and your family did to design, capitalize, and supply counters for us. Someone had to do it, and I know I am not qualified to engineer anything for public use.

It is too easy for so many people to criticize, especially now, without having a solution to offer. If someone can't offer a solution, maybe there isn't a solution. I don't like people spouting-off about how bad something is, if they don't have a viable solution to offer. Your counter works well for bikes with spokes (which both of my bikes have). No complaints from my measurement of many courses!

Add Reply

Post
×
×
×
×
Link copied to your clipboard.
×